오늘은 어쩌다 한 번씩 비정기적으로 진행하는 odroid-u2/u3 보드를 업데이트 하는 과정을 정리해 보려고 한다. 그 이유로는 이걸 워낙 비정기적으로 진행하다 보니 어떻게 했는지 그 과정을 자꾸 잊어버리게 되는 것이다. 그래서 기왕 하는거 여기에 어느 정도 정리하려는 목적이다. 그리고 언제가 될지 모르겠지만 이걸 패키지로 엮어서 우분투 개인 PPA에 올리는 것이 최종 목표. 자동화가 될 때까지 이 포스트는 지속적으로 업데이트하려고 한다.
odroid-u2/u3에 달성해야 하는 목표는 다음과 같다.
- u-boot 업데이트
- Ubuntu 22.04 LTS로 업데이트
- 22.04 LTS기준 최신 커널과 모듈, 헤더 업데이트
가 되겠다. 업데이트하는 이유는 마지막으로 지원했던 u2/u3의 커널에서는 docker 를 지원하지 않았었는데 - 아마 3.8이 마지막이었던 것으로 기억한다 - 그래서 커널 업데이트 후 도커를 사용할 수 있게, 그리고 간단한 NFS서버를 만들려고 한다.
진행 과정을 간단하게 요약한다면 아래와 같다.
- 새 버전의 u-boot를 컴파일하여 u-boot.bin을 생성
- u-boot.bin을 emmc에 플래싱
- debootstrap 을 사용하여 우분투 rootfs 생성하기
- ubuntu ppa에서 커널 소스 받기
- check-config.sh를 사용하여 도커를 사용할 수 있는 최소한의 커널 플래그와 환경 설정
- 커널 컴파일 후 zImage, 헤더, 모듈을 emmc에 복사하기
완전 처음부터라면 dtb를 준비하거나 boot.cmd를 컴파일하는 과정도 필요하긴 한데, 이거는 이전에 해둔 것이 있어서 이번에는 같이 진행하지 않았고 기존 것을 그대로 사용한다. 나중에 다시 진행하게 된다면 여기에 다시 업데이트를 해야겠다.
전체적인 과정이 크게 어려운 것은 아니고 굉장히 귀찮은데 커널 컴파일 같은 작업은 시간을 꽤 소모하기 때문이다. 거기다가 USB UART같은게 없으면 부팅 중 어디서 뭐가 실패했는지 확인할 수 있는 방법이 없어서, 아무래도 시간에 더해 다음과 같은 장비까지 거의 필수적으로 있어야 한다.
- USB to UART 컨버터: ssh없이 시리얼 통신을 통해 부팅 상황을 확인하려고 한다.
- emmc 리더기: 파일을 직접 읽거나 써야 한다.

참고로 데스크탑에 ubuntu 22.04를 처음 설치하고 나서 이상하게도 /dev/ttyUSB0의 연결이 자꾸 나타났다가 곧바로 사라지는 문제가 생긴다. minicom을 사용할 수 없는데 이는 brltty에 조금 문제가 있는 것 같다. 해결하기 위해 다음의 링크를 참조할 수 있다. 요는 문제가 되는 부분을 지우거나 패키지를 삭제하는 것.
내 USB UART는 CP210x 칩셋이라는데, 그래서 해당 칩셋의 내용을 중 ENV를 그냥 주석처리하고 재부팅하는 것으로 해결했다.
$ cat /usr/lib/udev/rules.d/85-brltty.rules
...
# Device: 10C4:EA60
# Generic Identifier
# Vendor: Cygnal Integrated Products, Inc.
# Product: CP210x UART Bridge / myAVR mySmartUSB light
# BrailleMemo [Pocket]
# Seika [Braille Display]
#ENV{PRODUCT}=="10c4/ea60/*", ATTRS{manufacturer}=="Silicon Labs", ENV{BRLTTY_BRAILLE_DRIVER}="sk", GOTO="brltty_usb_run"

# Device: 10C4:EA80
# Generic Identifier
# Vendor: Cygnal Integrated Products, Inc.
# Product: CP210x UART Bridge
# Seika [Note Taker]
#ENV{PRODUCT}=="10c4/ea80/*", ATTRS{manufacturer}=="Silicon Laboratories", ENV{BRLTTY_BRAILLE_DRIVER}="sk", GOTO="brltty_usb_run"
...
모든 과정은 보드에서 직접 하면 굉장히 편하다. 크로스컴파일 설정이 필요 없고 이유를 알 수 없는 에러도 발생하지 않는다. 다만 이러려면 여분의 보드가 준비가 되어 있어야 하는데다가, 또 성능 문제로 컴파일이 너무나 오래 걸린다. 결국 크로스컴파일이 필요하고, 그래서 작업중에는 아래의 환경 변수가 필요하다.
$ export ARCH=arm
$ export CROSS_COMPILE=arm-linux-gnueabihf-
실제로는 더 복잡하겠지만 이 환경 변수를 사용하여 gcc에 프리픽스를 부여해서, 원래 실행해야 할 gcc가 아닌 arm-linux-gnueabihf-gcc를 호출하도록 하는 방식이 크로스컴파일이다. 우분투 커널 컴파일 가이드에서는 다음과 같은 패키지를 설치해 두어야 커널 컴파일을 진행할 수 있다고 가이드하고 있다. 여기에 함께, 크로스컴파일을 위한 gcc패키지 gcc-arm-linux-gnueabihf도 추가 설치한다.
$ sudo apt-get install libncurses-dev gawk flex bison openssl libssl-dev dkms libelf-dev libudev-dev libpci-dev libiberty-dev autoconf gcc-arm-linux-gnueabihf
dd를 이용한 디스크 백업하기
wiki: 루프 디바이스
wiki: 파일 마운트
가지고 있는 보드를 먼저 부팅해 보았다. minicom으로 확인해 보니 아래 메시지가 출력되며 정상적으로 부팅된 것을 확인하였다.
U-Boot 2020.10 (Dec 07 2020 - 04:58:42 +0000)

CPU:   Exynos4412 @ 1 GHz
Model: Odroid based on Exynos4412
Type:  u3
DRAM:  2 GiB
LDO20@VDDQ_EMMC_1.8V: set 1800000 uV; enabling
...
...
Kernel image @ 0x40008000 [ 0x000000 - 0x7c8510 ]
## Flattened Device Tree blob at 41f00000
   Booting using the fdt blob at 0x41f00000
   Using Device Tree in place at 41f00000, end 41f10fff

Starting kernel ...

[    0.000000] Booting Linux on physical CPU 0xa00
[    0.000000] Linux version 5.4.80-gc32b3e142fe9 (cublr@cublr-j5005) (gcc version 7.5.0 (Ubuntu/Linaro 7.5.0-3ubuntu1~18.04)) #1 SMP PREEMPT Mon Dec 28 22:01:48 KST 2020 ()
[    0.000000] CPU: ARMv7 Processor [413fc090] revision 0 (ARMv7), cr=10c5387d
...
...
See 'systemctl status systemd-resolved.service' for details.
[  OK  ] Stopped Network Time Synchronization.
[FAILED] Failed to start Network Time Synchronization.
See 'systemctl status systemd-timesyncd.service' for details.

Ubuntu 20.04 LTS cublr-j5005 ttySAC1

cublr-j5005 login:
정상적으로 부팅되는 것을 확인했으니 작업 진행 전 이 디스크 상태를 완전히 백업하고 싶다. 문제가 생기면 여기로 다시 복구하고 싶은 것이다.
dd를 사용하면 디스크를 통째로 덤프할 수 있는데(dd는 dump disk같은 것 아닐까? 정확하진 않음), 이를 통해 컴파일 후 부팅이 실패하는 상황이 발생한다면 덤프를 사용하여 이전 상태로 돌아갈 수 있다. 특히 좋은 것은 정상적인 하나의 상태를 만들었다면 다른 곳에 이를 계속 복사하기만 해도 된다. 나는 odroid-u3가 7개 있어서, 7대 모두 설치를 진행하지 않고 하나의 보드에서 부팅에 성공하면 dd로 덤프 후 그 결과를 다시 나머지 보드에 덮어씌운다.
dd는 덤프를 뜨고 씌우는 목적으로 쓴다기보다, 원하는 바이트만큼 읽어서 if->of로 복사하는 역할을 한다. 이 과정 사이에 다양한 작업, 이를테면 변환 같은 것도 할 수 있지만 그렇게 쓰는 것은 본 적이 없고 보통 /dev/zero나 /dev/urandom을 읽어서 어딘가에 쓴다거나 하는 것은 꽤 본 것 같다.
어쨌든 백업 전, fdisk를 통해 emmc의 파티션이 어떻게 설정되어 있는지를 본다면…
$ fdisk -l
...
...
Disk /dev/sdc: 58.24 GiB, 62537072640 bytes, 122142720 sectors
Disk model: MassStorageClass
Units: sectors of 1 * 512 = 512 bytes
Sector size (logical/physical): 512 bytes / 512 bytes
I/O size (minimum/optimal): 512 bytes / 512 bytes
Disklabel type: dos
Disk identifier: 0xb6896738

Device     Boot    Start       End   Sectors   Size Id Type
/dev/sdc1  *        3072    266239    263168 128.5M  6 FAT16
/dev/sdc2  *      266240  17043455  16777216     8G 83 Linux
/dev/sdc3       17043456 122142719 105099264  50.1G 83 Linux
이 파티션의 사이즈는 odroid-u2/u3 보드에서 고정되어 있는데, 이 내용은 여기서 확인할 수 있다. 여기에 표로 옮기면 대략 다음과 같다. odroid-u3관련 내용이지만 u2도 똑같다.
| Area Name | Size | From(sector #1) | To(Sector #) | Partition Name |
|---|---|---|---|---|
| Partition table / MBR | 512 | 0 | 0 | |
| fwbl1 | 15KB | 1 | 30 | |
| bl2 | 16KB | 31 | 62 | |
| u-boot | 328KB | 63 | 718 | |
| TrustZone SW | 256KB | 719 | 1230 | |
| u-boot environment | 16KB | 1231 | 1262 | |
| FAT16 for boot | 129M | 3072 | 266239 | mmcblk0p1 |
| EXT4 for root file system | Up to 64GB | 266240 | remaining blocks | mmcblk0p2 |
대략 이런 형태인데, fwbl1, bl2, u-boot, TrustZone SW는 당장 신경쓰지 않아도 된다. 유저가 어찌할 수 있는 부분이 아니고 그냥 보드에 지정되어 있다. FAT16과 그 아래 EXT4 루트 파일 시스템만 확인하면 된다. emmc가 이런 파티션으로 구성되어 있지 않다면 gparted나 fdisk 같은 프로그램을 통해 이런 모양으로 만들어주면 된다.
dd를 사용하여 emmc /dev/sdc를 backup.img로 덤프한다.
dd if=/dev/sdc of=/backup.img bs=1M count=8322 status=progress
fdisk로 확인한 섹터 크기는 512 bytes이며, /dev/sdc2의 End 섹터는 17043455이므로, 512*17043455, 8726248960바이트의 크기를 가진다. 이 크기만큼만 덤프하면 디스크를 그대로 덤프할 수 있는데, 해당 메가바이트로 환산하면 8322 MB이므로, bs를 1M, count는 8322로 잡아 진행한다(8322M * 1M). bs 1M씩 8322번 복사한다는 의미다. 덤프 중에 진행상황이 표시되지 않는다면 마냥 쳐다보고 있기가 괴로우므로 progress옵션을 함께 지정하자.
$ sudo dd if=/dev/sdc of=/home/cublr/backup.img bs=1M count=8322 status=progress
8704229376 bytes (8.7 GB, 8.1 GiB) copied, 181 s, 48.1 MB/s
8322+0 레코드 들어옴
8322+0 레코드 나감
8726249472 bytes (8.7 GB, 8.1 GiB) copied, 181.556 s, 48.1 MB/s```
약간의 시간이 걸려 다음과 같이 완료되었다. 이 덤프된 파일은 fdisk를 통해 정보를 확인할 수 있는데 다음과 같은 출력을 낸다.
$ fdisk -l ../backup.img
Disk ../backup.img: 8.13 GiB, 8726249472 bytes, 17043456 sectors
Units: sectors of 1 * 512 = 512 bytes
Sector size (logical/physical): 512 bytes / 512 bytes
I/O size (minimum/optimal): 512 bytes / 512 bytes
Disklabel type: dos
Disk identifier: 0xb6896738

Device      Boot    Start       End   Sectors   Size Id Type
backup.img1 *        3072    266239    263168 128.5M  6 FAT16
backup.img2 *      266240  17043455  16777216     8G 83 Linux
backup.img3      17043456 122142719 105099264  50.1G 83 Linux
내부적으로는 backup.img1~3의 이름을 가지는가 보다. 어쨌든 이를 루프 디바이스로써 리눅스 시스템에 마운트할 수 있는데, 마운트 옵션 중 offset을 이용하면 원하는 파티션만을 마운트할 수 있다. 시작 파티션이 266240일 때 이를 섹터 크기를 사용하여 바이트로 환산하면 136314880(266240 * 512 = 136314880)이다.
$ mkdir tmpmount
$ sudo mount -o loop,offset=136314880 backup.img ./tmpmount
$ cd tmpmount
$ ls -la
합계 68
drwxrwxr-x 17 cublr cublr 4096  5월  7 20:02 .
drwxr-x--- 26 cublr cublr 4096  5월  8 19:03 ..
lrwxrwxrwx  1 root      root         7  5월  7 19:36 bin -> usr/bin
drwxr-xr-x  2 root      root      4096  5월  7 20:02 boot
drwxr-xr-x  4 root      root      4096  5월  7 19:36 dev
drwxr-xr-x 63 root      root      4096  5월  7 19:55 etc
drwxr-xr-x  3 root      root      4096  5월  7 19:55 home
lrwxrwxrwx  1 root      root         7  5월  7 19:36 lib -> usr/lib
drwxr-xr-x  3 root      root      4096  4월  8 04:28 media
drwxr-xr-x  3 root      root      4096  4월  8 04:28 mnt
drwxr-xr-x  2 root      root      4096  5월  7 19:36 opt
...
확인 결과 디스크가 잘 덤프되었고 데이터도 잘 백업된 것 같다.
u-boot 컴파일
이제 부트 로더 u-boot를 업데이트해 보자. u-boot의 컴파일은 간단하다. 후술할 커널 컴파일과 마찬가지로 defconfig를 통해 적당한 초기 플래그를 생성한 후, 약간의 수정을 통해 플래그를 완성하고 이를 그대로 컴파일하면 된다. 오드로이드 보드에 대한 defconfig는 u-boot의 configs에 이미 만들어져 있으므로 이를 그대로 사용한다. 사실 u-boot는 딱히 초기 설정 이외 뭔가를 하지 않아도 잘 부팅되므로 그냥 그대로 쓰기로 했다.
$ git clone https://github.com/u-boot/u-boot.git --depth=1 --branch v2022.04
'u-boot'에 복제합니다...
remote: Enumerating objects: 19764, done.
remote: Counting objects: 100% (19764/19764), done.
remote: Compressing objects: 100% (17035/17035), done.
remote: Total 19764 (delta 3494), reused 7830 (delta 2385), pack-reused 0
오브젝트를 받는 중: 100% (19764/19764), 25.60 MiB | 9.57 MiB/s, 완료.
델타를 알아내는 중: 100% (3494/3494), 완료.
Note: switching to 'e4b6ebd3de982ae7185dbf689a030e73fd06e0d2'.

You are in 'detached HEAD' state. You can look around, make experimental
changes and commit them, and you can discard any commits you make in this
state without impacting any branches by switching back to a branch.

If you want to create a new branch to retain commits you create, you may
do so (now or later) by using -c with the switch command. Example:

  git switch -c <new-branch-name>

Or undo this operation with:

  git switch -

Turn off this advice by setting config variable advice.detachedHead to false
코드를 다운로드 후 odroid용으로 컴파일하면 대략 다음과 같은 과정을 거친다.
$ make odroid_defconfig                                                                                                                                                       ()
  HOSTCC  scripts/basic/fixdep
  HOSTCC  scripts/kconfig/conf.o
  YACC    scripts/kconfig/zconf.tab.c
  LEX     scripts/kconfig/zconf.lex.c
  HOSTCC  scripts/kconfig/zconf.tab.o
  HOSTLD  scripts/kconfig/conf

$ make -j8
scripts/kconfig/conf  --syncconfig Kconfig
  UPD     include/config.h
  CFG     u-boot.cfg
  GEN     include/autoconf.mk.dep
...
...
  DTC     arch/arm/dts/exynos4412-odroid.dtb
  SHIPPED dts/dt.dtb
  CAT     u-boot-dtb.bin
  COPY    u-boot.dtb
  COPY    u-boot.bin
원하는 결과인 u-boot.bin이 정상적으로 만들어졌다. 이제 이를 emmc에 플래싱하면 되는데, 이상하게 직접 하면 계속 잘 되지 않아서 보통 emmc recovery tool을 통해 업데이트하였다. 위 파티션 내용에서 설명한, 섹터 63부터 시작하는 곳에 u-boot.bin을 플래싱하면 되는데, 이게 이상하게 직접 dd를 통해 플래싱하면 아무런 효과가 없고 꼭 emmc recovery tool을 사용해야만 업데이트가 된다. 아마 부팅이 완료된 시스템에서는 u-boot에서 이 영역을 readonly 처리를 하는 것이 아닐까 하는데, 이것만 해결하면 자동화할 수 있을 것 같다.
emmc recovery tool은 다음과 같은 디렉토리/파일 구조를 가진다.
$ tree
.
├── boot.ini
└── update
    ├── bl1.bin
    ├── bl2.bin
    ├── sd_fusing.sh
    ├── tzsw.bin
    └── u-boot.bin

1 directory, 6 files
이를 emmc가 아니라 sd카드에 플래싱하고 여기서 새롭게 컴파일한 u-boot.bin을 기존의 u-boot.bin과 교체한다. 원래대로라면 recovery tool의 u-boot.bin이 업데이트되는데, 업데이트를 새로 만든 u-boot.bin으로 대신 진행하려 하기 때문이다. emmc를 탈착한 상태에서 이 sd카드로만 부팅 후 잠시 기다렸다가 emmc를 장착하고, 또 잠시 기다렸다가 PC와 오드로이드를 USB케이블로 연결하면 플래싱이 시작된다.(전원이 들어오는지만 보는 것 같다. 설명도 트리거로 삼는다고만 되어 있다.)
USB UART를 사용해서 확인하면 위 내용이 다음과 같이 진행된다.
U-Boot 2010.12-svn (May 12 2014 - 15:05:46) for Exynox4412


CPU: S5PC220 [Samsung SOC on SMP Platform Base on ARM CortexA9]
APLL = 1000MHz, MPLL = 880MHz
DRAM:  2 GiB

PMIC VERSION : 0x00, CHIP REV : 2
TrustZone Enabled BSP
BL1 version: 20121128


Checking Boot Mode ... SDMMC
MMC Device 0: 30528 MB
MMC Device 1 not found
*** Warning - using default environment

USB3503 NINT = OUTPUT LOW!
ModeKey Check... run normal_boot
No ethernet found.
Hit any key to stop autoboot:  0
do_fat_cfgload : cmd = fatload mmc 0:1 0x41000000 boot.ini
reading boot.ini
2701 bytes read in 25 ms (105.5 KiB/s)
Find boot.ini file from FAT Area!!
boot.ini command = setenv flag_true                1
boot.ini command = setenv flag_false               0
boot.ini command = setenv system_memory_end        80000000
boot.ini command = setenv emmc_update_from_sdmmc   1
boot.ini command = setenv emmc_wait    'if itest.s ${emmc_update_from_sdmmc} -eq ${flag_true}; then wait_usb_trigger; fi;'
boot.ini command = run emmc_wait
Insert eMMC Module before usb connect....
Trigger Detected... read boot.scr form SDMMC & boot
boot.ini command = setenv movi_init    'if itest.s ${emmc_update_from_sdmmc} -eq ${flag_true}; then movi init 1; fi;'
boot.ini command = run movi_init
emmc reset...
REVISION: 2.0
Manufacture ID 0x11 [ 59640MB ]
NAME: S5P_MSHC4
Device: S5P_MSHC4
Manufacturer ID: 11
OEM: 100
Name: 064G9
Tran Speed: 0
Rd Block Len: 512
MMC version 4.0
High Capacity: Yes
Size: 0MB (block: 59640)
Bus Width: 8-bit DDR
Boot Partition Size: 4096 KB
boot.ini command = setenv update_device_num    1
boot.ini command = setenv load_device_num      0
boot.ini command = setenv load_partition_num   1
boot.ini command = setenv emmc_open    'if itest.s ${emmc_update_from_sdmmc} -eq ${flag_true}; then emmc open 1; fi;'
boot.ini command = run emmc_open;
eMMC OPEN Success.!!
                        !!!Notice!!!
!You must close eMMC boot Partition after all image writing!
!eMMC boot partition has continuity at image writing time.!
!So, Do not close boot partition, Before, all images is written.!
boot.ini command = fatload mmc 0:1 40008000 update/bl1.bin;
reading update/bl1.bin
15360 bytes read in 29 ms (516.6 KiB/s)
boot.ini command = setenv bl1_write    'if itest.s ${emmc_update_from_sdmmc} -eq ${flag_true}; then movi w z f 1 40008000; else movi w f 1 40008000; fi;'
boot.ini command = run bl1_write
writing FWBL1 ..device 1 Start 0, Count 30
MMC write: dev # 1, block # 0, count 30 ... 30 blocks written: OK
completed
boot.ini command = fatload mmc 0:1 40008000 update/bl2.bin;
reading update/bl2.bin
14592 bytes read in 32 ms (445.3 KiB/s)
boot.ini command = setenv bl2_write    'if itest.s ${emmc_update_from_sdmmc} -eq ${flag_true}; then movi w z b 1 40008000; else movi w b 1 40008000; fi;'
boot.ini command = run bl2_write
writing BL2 ..device 1 Start 30, Count 32
MMC write: dev # 1, block # 30, count 32 ... 32 blocks written: OK
completed
boot.ini command = fatload mmc 0:1 40008000 update/u-boot.bin;
reading update/u-boot.bin
489728 bytes read in 42 ms (11.1 MiB/s)
boot.ini command = setenv uboot_write  'if itest.s ${emmc_update_from_sdmmc} -eq ${flag_true}; then movi w z u 1 40008000; else movi w u 1 40008000; fi;'
boot.ini command = run uboot_write
writing bootloader..device 1 Start 62, Count 2048
MMC write: dev # 1, block # 62, count 2048 ... 2048 blocks written: OK
completed
boot.ini command = fatload mmc 0:1 40008000 update/tzsw.bin;
reading update/tzsw.bin
159744 bytes read in 28 ms (5.4 MiB/s)
boot.ini command = setenv tzsw_write   'if itest.s ${emmc_update_from_sdmmc} -eq ${flag_true}; then movi w z t 1 40008000; else movi w t 1 40008000; fi;'
boot.ini command = run tzsw_write
writing 1 TrustZone S/W.. Start 2110, Count 312
MMC write: dev # 1, block # 2110, count 312 ... 312 blocks written: OK
completed
boot.ini command = setenv emmc_close   'if itest.s ${emmc_update_from_sdmmc} -eq ${flag_true}; then emmc close 1; fi;'
boot.ini command = run emmc_close;
eMMC CLOSE Success.!!
boot.ini command = mmc write 1 0x40008000 0x977 0x20;

MMC write: dev # 1, block # 2423, count 32 ... 32 blocks written: OK
이제 emmc를 사용하여 부팅하면 아래와 같이 새 버전의 u-boot로 부팅되는 것을 확인할 수 있다. 처음에는 버전 2022.04으로 했는데 조금 진행하다 다시 rc버전으로 올려서, 위에서 설명한 내용과는 출력된 버전이 다르다.
U-Boot 2022.07-rc1-00291-g145921bdbd (May 07 2022 - 18:10:11 +0900)

CPU:   Exynos4412 @ 1 GHz
Model: Odroid based on Exynos4412
Type:  u3
DRAM:  2 GiB
Core:  101 devices, 12 uclasses, devicetree: separate
LDO20@VDDQ_EMMC_1.8V: set 1800000 uV; enabling
LDO22@VDDQ_EMMC_2.8V: set 2800000 uV; enabling
LDO21@TFLASH_2.8V: set 2800000 uV; enabling
MMC:   sdhci@12530000 - probe failed: -19

Loading Environment from MMC... *** Warning - bad CRC, using default environment

Boot device: MMC(0)
Net:   No ethernet found.
Hit any key to stop autoboot:  0
no mmc device at slot 2
switch to partitions #0, OK
mmc0(part 0) is current device
** No partition table - mmc 0 **
Couldn't find partition mmc 0:1
debootstrap을 사용한 rootfs 생성
debootstrap을 사용하면 데비안 기반 리눅스, 우분투 등의 시스템 파일 상태를 가지는 rootfs를 만들 수 있다. 물론 커널이나 다른 기타 데이터는 직접 준비해야 한다. 이 또한 데스크탑에서 진행할 것이므로, armhf용 어플리케이션을 실행하기 위해 qemu-arm-static이 필요하다. 이는 패키지 qemu-user-static에 포함되어 있다.
sudo apt-get install -y qemu-user-static binfmt-support debootstrap
한국에서 armhf용 우분투 패키지를 제공하는 곳은 kr.ports.ubuntu.com 인데, 이게 ip를 찍어 보면 영국에서 제공하고 있는 것 같다. 그래서 설치 속도가 그다지 빠르지는 않다… 어쨌든 새 우분투의 코드네임은 jammy jellyfish이므로 아래와 같은 형태로 debootstrap을 진행할 수 있다.
debootstrap은 크게 두 스텝으로 나뉜다. 첫 스텝은 패키지를 다운로드하기만 하는 것 같고, 두 번째 스텝으로 패키지를 설치하는 과정을 거치는 것 같다.
$ sudo debootstrap --foreign --arch=armhf jammy . http://kr.ports.ubuntu.com/
I: Retrieving InRelease
I: Checking Release signature
I: Valid Release signature (key id F6ECB3762474EDA9D21B7022871920D1991BC93C)
I: Retrieving Packages
I: Validating Packages
I: Resolving dependencies of required packages...
I: Resolving dependencies of base packages...
I: Checking component main on http://kr.ports.ubuntu.com...
I: Retrieving adduser 3.118ubuntu5
I: Validating adduser 3.118ubuntu5
I: Retrieving apt 2.4.5
I: Validating apt 2.4.5
I: Retrieving apt-utils 2.4.5
I: Validating apt-utils 2.4.5
I: Retrieving base-files 12ubuntu4
I: Validating base-files 12ubuntu4
I: Retrieving base-passwd 3.5.52build1
I: Validating base-passwd 3.5.52build1
I: Retrieving bash 5.1-6ubuntu1
I: Validating bash 5.1-6ubuntu1
I: Retrieving bsdutils 1:2.37.2-4ubuntu3
...
...
두 번째 스텝은 다음과 같이 진행된다. chroot를 통해 새로운 루트 위치를 debootstrap가 생성한 디렉토리가 되도록 조정한다.
$ sudo chroot . debootstrap/debootstrap --second-stage --verbose
I: Installing core packages...
I: Unpacking required packages...
I: Unpacking base-files...
I: Unpacking base-passwd...
I: Unpacking bash...
I: Unpacking bsdutils...
I: Unpacking coreutils...
I: Unpacking dash...
I: Unpacking debconf...
I: Unpacking debianutils...
I: Unpacking diffutils...
I: Unpacking dpkg...
...
...
I: Configuring the base system...
I: Configuring media-types...
I: Configuring libtext-iconv-perl...
I: Configuring libtext-charwidth-perl...
I: Configuring init...
I: Configuring xdg-user-dirs...
I: Configuring libyaml-0-2:armhf...
I: Configuring libglib2.0-0:armhf...
I: Configuring distro-info-data...
I: Configuring libestr0:armhf...
I: Configuring libfastjson4:armhf...
I: Configuring libsqlite3-0:armhf...
I: Configuring cron...
...
...
I: Configuring python3-yaml...
I: Configuring netplan.io...
I: Configuring ubuntu-advantage-tools...
I: Configuring networkd-dispatcher...
I: Configuring kbd...
I: Configuring console-setup-linux...
I: Configuring console-setup...
I: Configuring ubuntu-minimal...
I: Configuring libc-bin...
I: Configuring ca-certificates...
I: Base system installed successfully.
필요한 아주 최소의 패키지가 설치되었으므로 여기에 아주 기본적인 설정을 진행하려고 한다. 예를 들어 새 유저 ubuntu를 추가하거나, 최초 부팅시 필요한 파티션을 마운트하도록 fstab을 수정하거나 하는 작업이 되겠다. 아래 내용을 통해 debootstrap의 결과로 나온 rootfs를 실제 리눅스가 돌아가는 환경처럼 만들어줄 수 있다
마운트 타입이 다 제각각이라 이 또한 나중에 함께 정리해보면 좋을 것 같다. 왜 bind인지, 왜 proc인지 등등.
$ sudo mount -t sysfs sysfs sys/
$ sudo mount -t proc proc proc/
$ sudo mount -o bind /dev dev/
$ sudo mount -o bind /dev/pts dev/pts
이후 필요한 초기 패키지를 설치해 나간다.
$ sudo chroot . apt-get update
Hit:1 http://kr.ports.ubuntu.com jammy InRelease
Get:2 http://kr.ports.ubuntu.com jammy/main Translation-en [510 kB]
Fetched 510 kB in 4s (119 kB/s)

$ sudo chroot . apt-get -y install openssh-server
Reading package lists... Done
Building dependency tree... Done
The following additional packages will be installed:
  libcbor0.8 libedit2 libfido2-1 libpsl5 libwrap0 libx11-6 libx11-data libxau6 libxcb1 libxdmcp6 libxext6 libxmuu1 ncurses-term openssh-client openssh-sftp-server publicsuffix python3-distro ssh-import-id
  wget xauth
Suggested packages:
  keychain libpam-ssh monkeysphere ssh-askpass molly-guard ufw
The following NEW packages will be installed:
  libcbor0.8 libedit2 libfido2-1 libpsl5 libwrap0 libx11-6 libx11-data libxau6 libxcb1 libxdmcp6 libxext6 libxmuu1 ncurses-term openssh-client openssh-server openssh-sftp-server publicsuffix python3-distro
  ssh-import-id wget xauth
0 upgraded, 21 newly installed, 0 to remove and 0 not upgraded.
Need to get 3245 kB of archives.
After this operation, 14.9 MB of additional disk space will be used.
Get:1 http://kr.ports.ubuntu.com jammy/main armhf libedit2 armhf 3.1-20210910-1build1 [78.7 kB]

$ sudo chroot . adduser ubuntu
perl: warning: Setting locale failed.
perl: warning: Please check that your locale settings:
	LANGUAGE = "ko",
	LC_ALL = (unset),
	LANG = "ko_KR.UTF-8"
    are supported and installed on your system.
perl: warning: Falling back to the standard locale ("C").
Adding user `ubuntu' ...
Adding new group `ubuntu' (1000) ...
Adding new user `ubuntu' (1000) with group `ubuntu' ...
Creating home directory `/home/ubuntu' ...
Copying files from `/etc/skel' ...
New password:
Retype new password:
passwd: password updated successfully
Changing the user information for ubuntu
Enter the new value, or press ENTER for the default
	Full Name []:
	Room Number []:
	Work Phone []:
	Home Phone []:
	Other []:
Is the information correct? [Y/n] y
이 서버에 접속할 수 있도록 openssh-server를, 그리고 초기 유저가 필요하므로 ubuntu라는 유저를 추가해 주었다. 유저 ubuntu의 경우 root권한이 필요하므로 그룹 sudo에 포함시키는 것이 좋겠다. 이외에도 호스트네임을 변경하거나 fstab등을 미리 등록해 두거나, 필요한 추가 패키지를 더 설치해도 된다. 모두 완료한 후에는 이를 emmc에 복사한다. 별 상관은 없지만 파일 메타데이터도 그대로 유지하며 복사하고 싶어서 rsync를 사용하였다.
$ sudo rsync -aX --progress ./ /media/cublr/1f683619-b0ab-4df2-a676-c2a8ee15e432/
sending incremental file list
./
bin -> usr/bin
lib -> usr/lib
sbin -> usr/sbin
boot/
dev/
dev/console
dev/fd -> /proc/self/fd
dev/full
dev/null
dev/ptmx
dev/random
dev/stderr -> /proc/self/fd/2
dev/stdin -> /proc/self/fd/0
dev/stdout -> /proc/self/fd/1
dev/tty
dev/urandom
dev/zero
dev/pts/
dev/shm/
etc/
etc/.pwd.lock
              0 100%    0.00kB/s    0:00:00 (xfr#1, ir-chk=1235/1269)
etc/adduser.conf
          3,028 100%    0.00kB/s    0:00:00 (xfr#2, ir-chk=1234/1269)
etc/bash.bashrc
          2,319 100%    2.21MB/s    0:00:00 (xfr#3, ir-chk=1233/1269)
etc/bindresvport.blacklist
            367 100%  358.40kB/s    0:00:00 (xfr#4, ir-chk=1232/1269)
etc/ca-certificates.conf
          5,529 100%    5.27MB/s    0:00:00 (xfr#5, ir-chk=1231/1269)
etc/crontab
          1,136 100%    1.08MB/s    0:00:00 (xfr#6, ir-chk=1230/1269)
etc/debconf.conf
          2,969 100%    2.83MB/s    0:00:00 (xfr#7, ir-chk=1229/1269)

...
그리고 emmc를 다시 오드로이드에 장착 후 부팅하면 정상적으로 22.04로 올라온다.
U-Boot 2022.07-rc1-00291-g145921bdbd (May 07 2022 - 18:10:11 +0900)

CPU:   Exynos4412 @ 1 GHz
Model: Odroid based on Exynos4412
Type:  u3
...
...
Starting kernel ...

[    0.000000] Booting Linux on physical CPU 0xa00
[    0.000000] Linux version 5.4.80-gc32b3e142fe9 (cublr@cublr-j5005) (gcc version 7.5.0 (Ubuntu/Linaro 7.5.0-3ubuntu1~18.04)) #1 SMP PREEMPT Mon Dec 28 22:01:48 KST 2020 ()
[    0.000000] CPU: ARMv7 Processor [413fc090] revision 0 (ARMv7), cr=10c5387d
[    0.000000] CPU: PIPT / VIPT nonaliasing data cache, VIPT aliasing instruction cache
[    0.000000] OF: fdt: Machine model: Hardkernel ODROID-X2 board based on Exynos4412
[    0.000000] Memory policy: Data cache writealloc
[    0.000000] Reserved memory: created DMA memory pool at 0xbf700000, size 8 MiB
...
...
[  OK  ] Started Dispatcher daemon for systemd-networkd.
[  OK  ] Reached target Multi-User System.
[  OK  ] Reached target Graphical Interface.
         Starting Record Runlevel Change in UTMP...
[  OK  ] Finished Record Runlevel Change in UTMP.

Ubuntu 22.04 LTS cublr-nfs-storage-0001 ttySAC1

cublr-nfs-storage-0001 login:
커널 컴파일
커널 컴파일의 목표로 zImage, 커널 헤더, 모듈을 만들려 한다.
우선 zImage만 만들어도 부팅에는 문제가 없는데, 패키지를 추가로 설치하거나 할 때
문제가 발생할 수 있다. 펌웨어도 원래대로라면 필요하겠는데 커널 4버전인가
언젠가부터 커널 소스 트리에서 생성하는 펌웨어 인스톨이 없어졌고, 그냥 각 리눅스
배포판에서 제공하도록 바뀐 것 같다.
예를 들어 우분투에서는 이를 linux-firmware라는 패키지로 제공하는데, 용량이 매우 크다.
$ sudo apt-get install linux-firmware
Reading package lists... Done
Building dependency tree... Done
Reading state information... Done
Recommended packages:
  firmware-sof-signed
The following NEW packages will be installed:
  linux-firmware
0 upgraded, 1 newly installed, 0 to remove and 0 not upgraded.
Need to get 238 MB of archives.
After this operation, 866 MB of additional disk space will be used.
아무튼 커널 컴파일을 위해 커널 소스를 다운로드하자. 우분투 jammy에서 사용하는 커널 소스는 여기에서 다운로드할 수 있다.
https://git.launchpad.net/~ubuntu-kernel-stable/+git/jammy
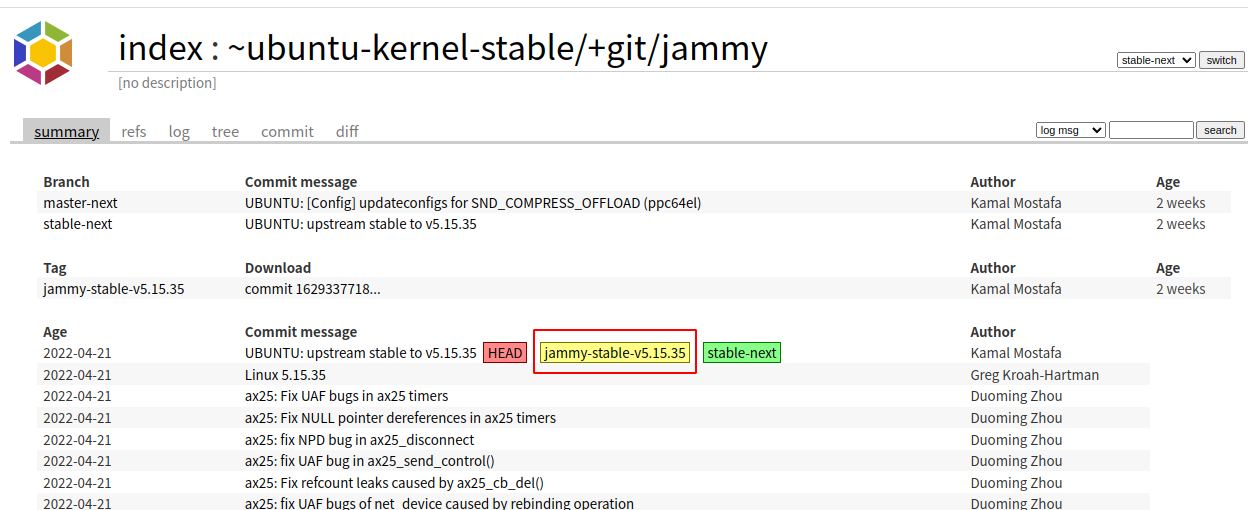
현재 최신 태그는 jammy-stable-v5.15.35이므로, 이를 바로 가져와 보자. 커널 소스는 용량이 매우 크기 때문에 모두 다운로드하려면 시간이 꽤 걸려서 특정 브랜치의 1depth만을 가져오기 위해 다음과 같은 옵션을 주었다.
$ git clone https://git.launchpad.net/~ubuntu-kernel-stable/+git/jammy --branch jammy-stable-v5.15.35 --depth 1
커널 컴파일은 여러 환경에 맞는 커널을 컴파일하기 위해 컴파일 전, 만들어낼 커널의 기능을 토글할 수 있는 방법을 제공한다. 그래서 컴파일 전에는 반드시 필요한 커널 플래그를 설정해 주어야 하는데, 그 필드가 매우 방대하므로 모든 것을 직접 설정하기에는 매우 어렵다. 그래서 커널 소스에서 defconfig라는 이름으로 현존하는 많은 환경에 대한 커널 플래그를 미리 준비해 두고 있다. 그러므로 커널 컴파일을 하기 전에 어떤 defconfig를 사용해야 가장 변경이 적을지 알아보는 것이 좋다.
u2/u3에 대한 전용 설정은 딱히 없지만 가장 가까운 defconfig로는 exynos_defconfig가 있다. 하드커널의 옛 커널 소스에서 odroidu_defconfig를 제공하고 있지만 지금 커널과는 많이 다르기 때문에 그대로 사용할 수는 없을거고, 나중에 시간이 되면 뭐가 다른지 알아보면 좋을 것 같다.
아무튼 이 exynos_defconfig를 사용하여 위에서 진행했던 u-boot 컴파일 과정과 마찬가지로 초기 설정을 만들고 여기에 추가 기능을 위한 플래그도 활성화시킨다.
$  make exynos_defconfig
#
# configuration written to .config
#
make menuconfig를 사용하면 TUI상에서 각 플래그의 의존 관계를 보면서 플래그를 켜거나 끌 수 있다. 이 커널 빌드의 목표 중 하나는 NFS서버이므로 NFS관련 플래그를 활성화, 두 번째는 컨테이너를 실행할 수 있도록 네임스페이스와 기타 네트워크 관련 기능을 활성화한다.
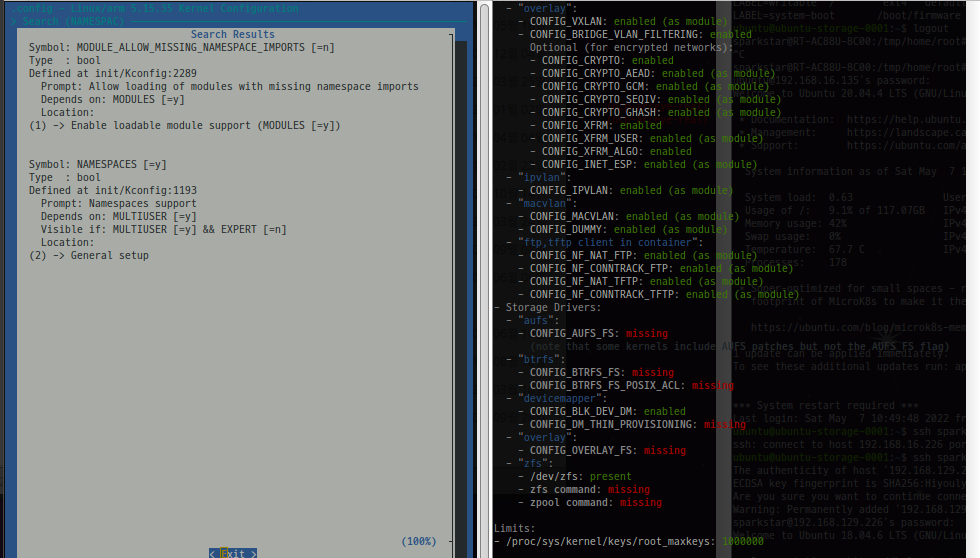
menuconfig 실행 중 /를 눌러 각 플래그를 검색해보는 것이 가능하다. 하지만 도커를 위해 어떤 커널 플래그가 필요할 지를 알 수가 없는데, 그리하여 여기서부터는 check-config를 통해 커널의 상태가 도커와 적합한지를 확인한다. 컴파일된 커널이 도커를 사용하는 것에 무리가 없도록 플래그를 조정하였다. 스크립트 내용을 보면 .config를 읽어올 경로가 정의되어 있어서 이를 그냥 커널 소스의 .config만 보도록 고치면 뭐 그럭저럭 간단하다.
check-config의 결과를 모두 enabled로 만들지 않아도 되는데, 예를 들어 aufs를 사용하지 않을 거라면 플래그는 필요 없고.. 뭐 그런 식. cgroups이나 nat, iptables, apparmor/selinux 정도가 중요할 것 같은데 자세한 건 공식 매뉴얼을 통해…
$ make -j8
  SYNC    include/config/auto.conf.cmd
  SYSHDR  arch/arm/include/generated/uapi/asm/unistd-oabi.h
  SYSHDR  arch/arm/include/generated/uapi/asm/unistd-eabi.h
  WRAP    arch/arm/include/generated/uapi/asm/kvm_para.h
  WRAP    arch/arm/include/generated/uapi/asm/bitsperlong.h
  WRAP    arch/arm/include/generated/uapi/asm/ioctl.h
  ...
  ...
  HOSTCC  scripts/dtc/fstree.o
  HOSTCC  scripts/dtc/data.o
  HOSTCC  scripts/dtc/livetree.o
  HOSTCC  scripts/dtc/treesource.o
  WRAP    arch/arm/include/generated/asm/early_ioremap.h
  ...
  ...
  CC [M]  net/hsr/hsr_framereg.o
  LD [M]  net/vmw_vsock/vsock.o
  LD [M]  net/vmw_vsock/vsock_diag.o
  LD [M]  net/vmw_vsock/vmw_vsock_virtio_transport_common.o
  CC [M]  net/hsr/hsr_slave.o
  ...
  ...
  CC      fs/fhandle.o
  CC [M]  fs/shiftfs.o
  LD [M]  net/hsr/hsr.o
  AR      net/built-in.a
  AR      fs/built-in.a
그 다음은 보드에서 사용할 zImage를 생성해 보자.
$ make zImage
  CALL    scripts/checksyscalls.sh
  CALL    scripts/atomic/check-atomics.sh
  CHK     include/generated/compile.h
  CC      kernel/bpf/core.o
  CC      kernel/bpf/syscall.o
  CC      kernel/bpf/verifier.o
  CC      kernel/bpf/inode.o
  CC      kernel/bpf/task_iter.o
...
...
  SHIPPED arch/arm/boot/compressed/bswapsdi2.S
  AS      arch/arm/boot/compressed/bswapsdi2.o
  LD      arch/arm/boot/compressed/vmlinux
  OBJCOPY arch/arm/boot/zImage
  Kernel: arch/arm/boot/zImage is ready
이 zImage를 emmc FAT16 파티션에 복사하면 된다. 이미 u-boot에서는 FAT16의 zImage를 읽어서 부팅하도록 되어 있다.
그 다음에는 커널 헤더와 모듈도 같이 설치해 보자.
커널 헤더와 모듈은 컴파일된 커널 소스 트리에서 각각 make headers_install, make modules_install을 입력하여 만들어낼 수 있다. 문제는 그대로 입력하면 내 데스크탑의 헤더와 모듈 경로에 그대로 복사해버린다는 것인데, 이를 방지하기 위해 INSTALL_HDR_PATH, INSTALL_MOD_PATH의 환경 변수를 통해 설치할 경로를 따로 지정해 둔다.
$ make INSTALL_HDR_PATH=compiled_header headers_install
  HOSTCC  scripts/unifdef
  HDRINST usr/include/asm-generic/stat.h
  HDRINST usr/include/asm-generic/fcntl.h
  HDRINST usr/include/asm-generic/termios.h
  HDRINST usr/include/asm-generic/signal-defs.h
  ...
  ...
  HDRINST usr/include/asm/kvm_para.h
  HDRINST usr/include/asm/resource.h
  HDRINST usr/include/asm/bitsperlong.h
  HDRINST usr/include/asm/ipcbuf.h
  HDRINST usr/include/asm/sembuf.h
  INSTALL compiled_header/include

$ make INSTALL_MOD_PATH=compiled_module modules_install
  INSTALL compiled_module/lib/modules/5.15.35-g162933771873/kernel/arch/arm/crypto/aes-arm-bs.ko
  INSTALL compiled_module/lib/modules/5.15.35-g162933771873/kernel/arch/arm/crypto/chacha-neon.ko
  INSTALL compiled_module/lib/modules/5.15.35-g162933771873/kernel/arch/arm/crypto/sha1-arm-neon.ko
  INSTALL compiled_module/lib/modules/5.15.35-g162933771873/kernel/arch/arm/crypto/sha1-arm.ko
  ...
  ...
  INSTALL compiled_module/lib/modules/5.15.35-g162933771873/kernel/net/nfc/nci/nci_uart.ko
  INSTALL compiled_module/lib/modules/5.15.35-g162933771873/kernel/net/nfc/nfc_digital.ko
  INSTALL compiled_module/lib/modules/5.15.35-g162933771873/kernel/net/sched/cls_cgroup.ko
  INSTALL compiled_module/lib/modules/5.15.35-g162933771873/kernel/net/wireless/cfg80211.ko
  INSTALL compiled_module/lib/modules/5.15.35-g162933771873/kernel/net/xfrm/xfrm_user.ko
  DEPMOD  compiled_module/lib/modules/5.15.35-g162933771873
이제 compiled_header, compiled_module 밑에 있는 헤더와 모듈 모두 그대로 emmc에 복사하면 된다. 각 모듈은 환경변수를 루트로 삼아 설치하였으므로, 그대로 새로운 emmc루트에 복사하면 된다.
U-Boot 2022.07-rc1-00291-g145921bdbd (May 07 2022 - 18:10:11 +0900)

CPU:   Exynos4412 @ 1 GHz
Model: Odroid based on Exynos4412
Type:  u3
DRAM:  2 GiB
Core:  101 devices, 12 uclasses, devicetree: separate
LDO20@VDDQ_EMMC_1.8V: set 1800000 uV; enabling
LDO22@VDDQ_EMMC_2.8V: set 2800000 uV; enabling
LDO21@TFLASH_2.8V: set 2800000 uV; enabling
MMC:   sdhci@12530000 - probe failed: -19

Loading Environment from MMC... *** Warning - bad CRC, using default environment

Boot device: MMC(0)
Net:   No ethernet found.
Hit any key to stop autoboot:  0
no mmc device at slot 2
switch to partitions #0, OK
mmc0(part 0) is current device
Scanning mmc 0:1...
Found U-Boot script /boot.scr
773 bytes read in 2 ms (377 KiB/s)
## Executing script at 42000000
7609984 bytes read in 268 ms (27.1 MiB/s)
53984 bytes read in 4 ms (12.9 MiB/s)
Kernel image @ 0x40008000 [ 0x000000 - 0x741e80 ]
## Flattened Device Tree blob at 41f00000
   Booting using the fdt blob at 0x41f00000
   Using Device Tree in place at 41f00000, end 41f10fff

Starting kernel ...

[    0.000000] Booting Linux on physical CPU 0xa00
[    0.000000] Linux version 5.15.35-g162933771873 (cublr@cublr-naverlabs) (arm-linux-gnueabihf-gcc (Ubuntu 11.2.0-17ubuntu1) 11.2.0, GNU ld (GNU Binutils for Ubuntu) 2.38) #4 SMP PREEMPT Sun May 8 17:)
[    0.000000] CPU: ARMv7 Processor [413fc090] revision 0 (ARMv7), cr=10c5387d
[    0.000000] CPU: PIPT / VIPT nonaliasing data cache, VIPT aliasing instruction cache
[    0.000000] OF: fdt: Machine model: Hardkernel ODROID-X2 board based on Exynos4412
[    0.000000] Memory policy: Data cache writealloc
[    0.000000] Reserved memory: created DMA memory pool at 0xbf700000, size 8 MiB
[    0.000000] OF: reserved mem: initialized node region-mfc-right, compatible id shared-dma-pool
[    0.000000] Reserved memory: created DMA memory pool at 0xbd300000, size 36 MiB
[    0.000000] OF: reserved mem: initialized node region-mfc-left, compatible id shared-dma-pool
[    0.000000] cma: Reserved 96 MiB at 0xb7000000
[    0.000000] Samsung CPU ID: 0xe4412220
[    0.000000] Zone ranges:
[    0.000000]   Normal   [mem 0x0000000040000000-0x000000006fffffff]
[    0.000000]   HighMem  [mem 0x0000000070000000-0x00000000bfefffff]
[    0.000000] Movable zone start for each node
[    0.000000] Early memory node ranges
[    0.000000]   node   0: [mem 0x0000000040000000-0x00000000bd2fffff]
[    0.000000]   node   0: [mem 0x00000000bd300000-0x00000000bfefffff]
[    0.000000] Initmem setup node 0 [mem 0x0000000040000000-0x00000000bfefffff]
[    0.000000] Running under secure firmware.
[    0.000000] percpu: Embedded 16 pages/cpu s36588 r8192 d20756 u65536
[    0.000000] Built 1 zonelists, mobility grouping on.  Total pages: 522496
[    0.000000] Kernel command line: video=HDMI-A-1:1280x720M@60 console=ttySAC1,115200n8 root=PARTUUID=b6896738-02 rootfstype=ext4 rootwait ro
[    0.000000] Dentry cache hash table entries: 131072 (order: 7, 524288 bytes, linear)
[    0.000000] Inode-cache hash table entries: 65536 (order: 6, 262144 bytes, linear)
...
...
[  OK  ] Finished Set console scheme.
[  OK  ] Started OpenBSD Secure Shell server.
[  OK  ] Finished Remove Stale Onli…ext4 Metadata Check Snapshots.
[  OK  ] Created slice Slice /system/getty.
[  OK  ] Started Getty on tty1.
[  OK  ] Reached target Login Prompts.
[  OK  ] Started User Login Management.
[  OK  ] Started Dispatcher daemon for systemd-networkd.
[  OK  ] Reached target Multi-User System.
[  OK  ] Reached target Graphical Interface.
         Starting Record Runlevel Change in UTMP...
[  OK  ] Finished Record Runlevel Change in UTMP.

Ubuntu 22.04 LTS cublr-nfs-storage-0001 ttySAC1

cublr-nfs-storage-0001 login:
새 버전의 u-boot, 커널, 우분투로 새롭게 부팅된 것을 확인할 수 있다.
cublr-nfs-storage-0001 login: ubuntu
Password:
Welcome to Ubuntu 22.04 LTS (GNU/Linux 5.15.35-g162933771873 armv7l)

 * Documentation:  https://help.ubuntu.com
 * Management:     https://landscape.canonical.com
 * Support:        https://ubuntu.com/advantage

The programs included with the Ubuntu system are free software;
the exact distribution terms for each program are described in the
individual files in /usr/share/doc/*/copyright.

Ubuntu comes with ABSOLUTELY NO WARRANTY, to the extent permitted by
applicable law.

To run a command as administrator (user "root"), use "sudo <command>".
See "man sudo_root" for details.

ubuntu@cublr-nfs-storage-0001:~$ uname -r
5.15.35-g162933771873
이전 커널 4.15대에서는 리부팅을 시도하면 보드가 그냥 먹통이 되어서, 반드시 전원을 분리하거나 하드웨어 리셋을 통해 새롭게 부팅했어야 했다. 그런데 u-boot, 커널 모두 새 버전이라 그런가, 이상하게 재부팅이 잘 되어서 의심하는 중. 어? 잘 되네?
$ sudo reboot
[sudo] password for ubuntu:
         Stopping Session c1 of User ubuntu...
[  OK  ] Removed slice Slice /system/modprobe.
[  OK  ] Stopped target Graphical Interface.
[  OK  ] Stopped target Multi-User System.
[  OK  ] Stopped target Login Prompts.
[  OK  ] Stopped target Host and Network Name Lookups.
[  OK  ] Stopped target Sound Card.
[  OK  ] Stopped target Timer Units.
...
...
[  OK  ] Stopped File System Check …3-74d5-45d4-b7d8-490b0f7e7061.
[  OK  ] Removed slice Slice /system/systemd-fsck.
[  OK  ] Stopped target Preparation for Local File Systems.
[  OK  ] Stopped Create Static Device Nodes in /dev.
[  OK  ] Stopped Create System Users.
[  OK  ] Stopped Remount Root and Kernel File Systems.
[  OK  ] Stopped File System Check on Root Device.
[  OK  ] Reached target System Shutdown.
[  OK  ] Reached target Late Shutdown Services.
[  OK  ] Finished System Reboot.
[  OK  ] Reached target System Reboot.
[  1

U-Boot 2022.07-rc1-00291-g145921bdbd (May 07 2022 - 18:10:11 +0900)

CPU:   Exynos4412 @ 1 GHz
Model: Odroid based on Exynos4412
Type:  u3
DRAM:  2 GiB
Core:  101 devices, 12 uclasses, devicetree: separate
LDO20@VDDQ_EMMC_1.8V: set 1800000 uV; enabling
LDO22@VDDQ_EMMC_2.8V: set 2800000 uV; enabling
LDO21@TFLASH_2.8V: set 2800000 uV; enabling
MMC:   sdhci@12530000 - probe failed: -19

Loading Environment from MMC... *** Warning - bad CRC, using default environment

Boot device: MMC(0)
Net:   No ethernet found.
Hit any key to stop autoboot:  0
no mmc device at slot 2
switch to partitions #0, OK
mmc0(part 0) is current device
Scanning mmc 0:1...
Found U-Boot script /boot.scr
773 bytes read in 2 ms (377 KiB/s)
## Executing script at 42000000
7609984 bytes read in 268 ms (27.1 MiB/s)
53984 bytes read in 5 ms (10.3 MiB/s)
Kernel image @ 0x40008000 [ 0x000000 - 0x741e80 ]
## Flattened Device Tree blob at 41f00000
   Booting using the fdt blob at 0x41f00000
   Using Device Tree in place at 41f00000, end 41f10fff

Starting kernel ...

[    0.000000] Booting Linux on physical CPU 0xa00
[    0.000000] Linux version 5.15.35-g162933771873 (cublr@cublr-naverla)
[    0.000000] CPU: ARMv7 Processor [413fc090] revision 0 (ARMv7), cr=10c5387d
[    0.000000] CPU: PIPT / VIPT nonaliasing data cache, VIPT aliasing instructie
[    0.000000] OF: fdt: Machine model: Hardkernel ODROID-X2 board based on Exyn2
[    0.000000] Memory policy: Data cache writealloc
[    0.000000] Reserved memory: created DMA memory pool at 0xbf700000, size 8 MB
[    0.000000] OF: reserved mem: initialized node region-mfc-right, compatible l
[    0.000000] Reserved memory: created DMA memory pool at 0xbd300000, size 36 B
[    0.000000] OF: reserved mem: initialized node region-mfc-left, compatible il
[    0.000000] cma: Reserved 96 MiB at 0xb7000000
[    0.000000] Samsung CPU ID: 0xe4412220
...
...
커널 모듈이 들어 있으므로 nfs-server도 설치하여 정상적으로 동작시킬 수 있다.
$ ps -ef | grep nfs
root        63     2  0 14:48 ?        00:00:00 [nfsiod]
root       224     1  0 14:48 ?        00:00:00 /usr/sbin/nfsdcld
root       283     2  0 14:48 ?        00:00:00 [nfsd]
root       284     2  0 14:48 ?        00:00:00 [nfsd]
root       285     2  0 14:48 ?        00:00:00 [nfsd]
root       286     2  0 14:48 ?        00:00:00 [nfsd]
root       287     2  0 14:48 ?        00:00:00 [nfsd]
root       288     2  0 14:48 ?        00:00:00 [nfsd]
root       289     2  0 14:48 ?        00:00:00 [nfsd]
root       290     2  0 14:48 ?        00:00:00 [nfsd]
ubuntu     329   312  0 14:49 pts/0    00:00:00 grep --color=auto nfs

$ sudo service nfs-kernel-server status
● nfs-server.service - NFS server and services
     Loaded: loaded (/lib/systemd/system/nfs-server.service; enabled; vendor preset: enabled)
    Drop-In: /run/systemd/generator/nfs-server.service.d
             └─order-with-mounts.conf
     Active: active (exited) since Sun 2022-05-08 14:48:49 UTC; 59s ago
    Process: 276 ExecStartPre=/usr/sbin/exportfs -r (code=exited, status=0/SUCCESS)
    Process: 277 ExecStart=/usr/sbin/rpc.nfsd (code=exited, status=0/SUCCESS)
   Main PID: 277 (code=exited, status=0/SUCCESS)
        CPU: 107ms

May 08 14:48:49 cublr-nfs-storage-0001 systemd[1]: Starting NFS server and services...
May 08 14:48:49 cublr-nfs-storage-0001 systemd[1]: Finished NFS server and services.
다음 스텝
- 커널 자동 빌드
- u-boot 업데이트 자동화
- u-boot 자동 빌드
- emmc가 아닌 img에 결과 작성
- img를 호스팅하기(github releases나 다른 방법으로)
- 커널과 헤더, 모듈을
deb으로 패키징하기 - ppa 열기